Update your payroll policies

Updated May 23, 2026 5 min read Reviewed by The Payroll Success Team at Humanised

On this page
  1. Step 1 – Go to company settings
  2. Step 2 – Update your calculation policies to suit your payroll process
  3. Step 3 – Update your payroll policies


This article is for Owners and admins who use Humanised

Overview

Now that you have completed your basic company details and the next step is setting up your new HR and payroll system with the payroll policies. HR and payroll management process can look vastly different from one company to another specially in Sri Lanka. Humanised has recognised this need. You can learn how to customise the software to suit your unique process better in this article.

Step 1 – Go to company settings

Go to the last section on your left-hand navigation panel, the settings section. Click on “company settings

Step 2 – Update your calculation policies to suit your payroll process

1. Pay cycle

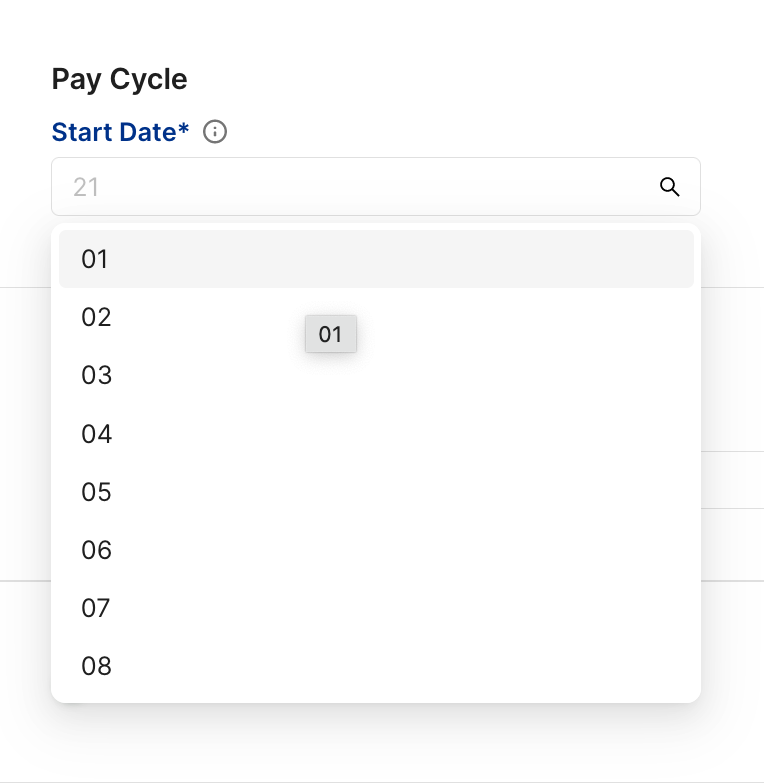
Although the pay cycle for most salaried employees is generally a month or 30 days, the start and end dates can vary from company to company depending on a number of reasons. There are 2 common patterns we have identified. Some companies define their pay cycle from the first of the month to the end of the month. Which some others usually start their pay cycle on a day like 26th of the previous month which means their pay cycle end on the 25th of the next month. In this field you simply have to fill in the start date of your pay cycle and it will automatically edit your pay cycle for each month according to what you have filled in

Pay cycle
Figure 1 – Pay cycle

2. EPF/ETF numbers

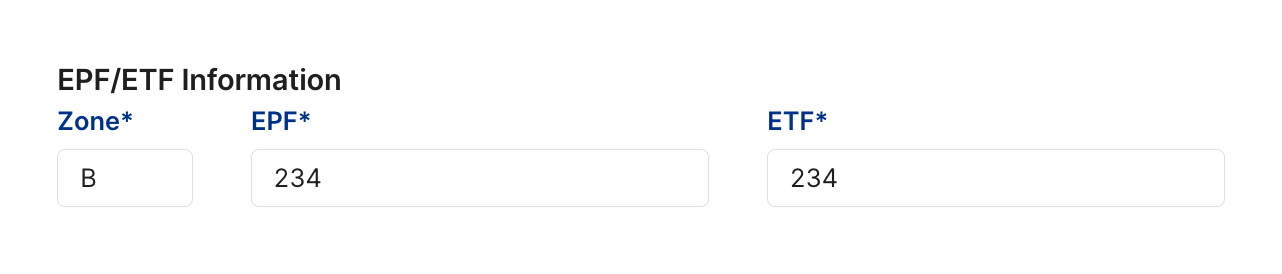
Imply fill in the zone and the number for EPF and ETF for your organisation. Typically employee EPF/ETF number are written with the company number in the front. Eg := 234/B/12

EPF/ETF number
Figure 2 – EPF/ETF number

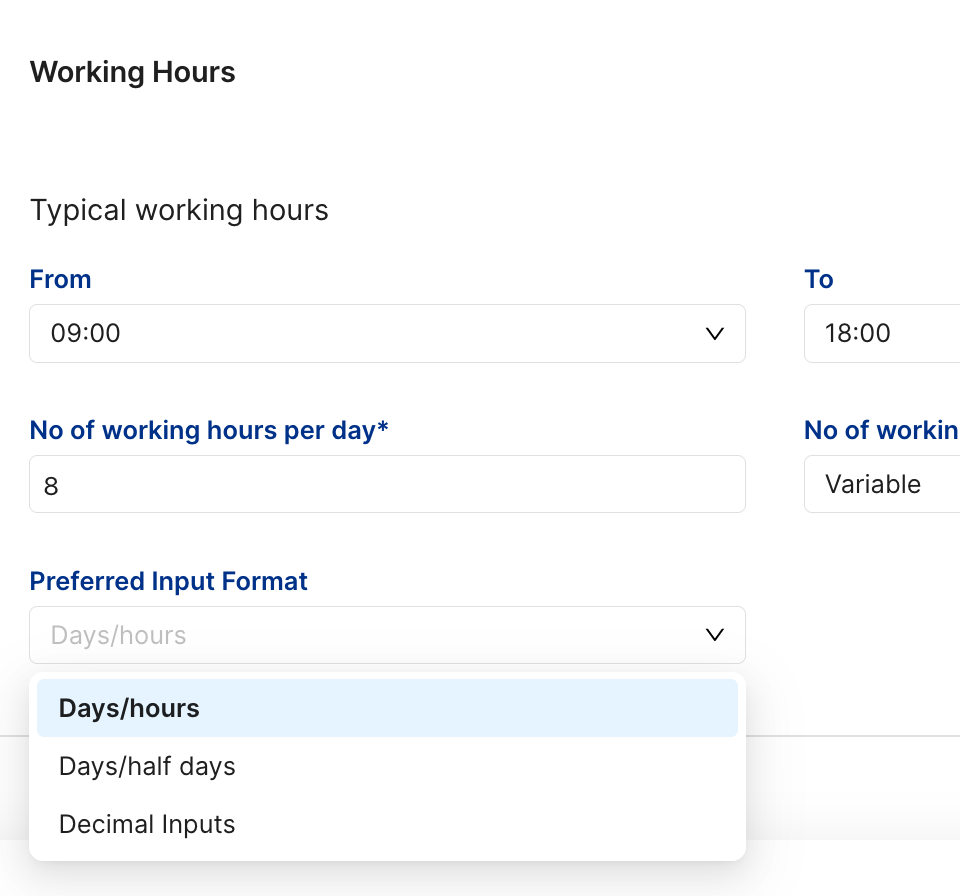
3. Working hours

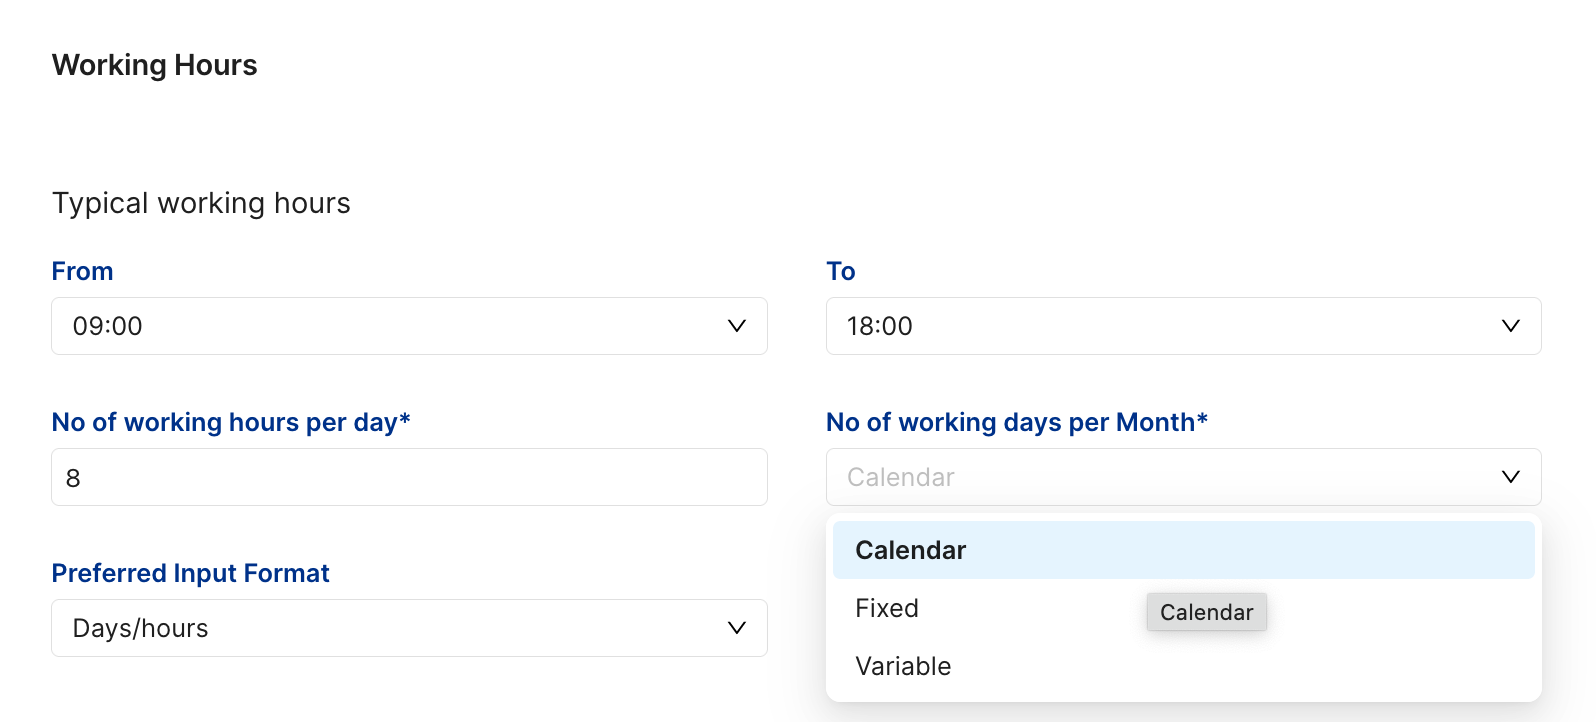
Filling in the start and end time is optional, and it does not get involved in any calculations. But the following details are mandatory

a. No.of working hours per day

This is what you consider for calculation purposes. Typical it will be 8 hours per day

b. No.of working days per month

This is also for calculation purposes. There are 3 option you can choose from.

working hours
Figure 3 – Working hours

I. Fixed – You can use a fixed no.of of days each month

II. Calendar – Your no.of days for the month will be the same as the no.of calendar days in each month.

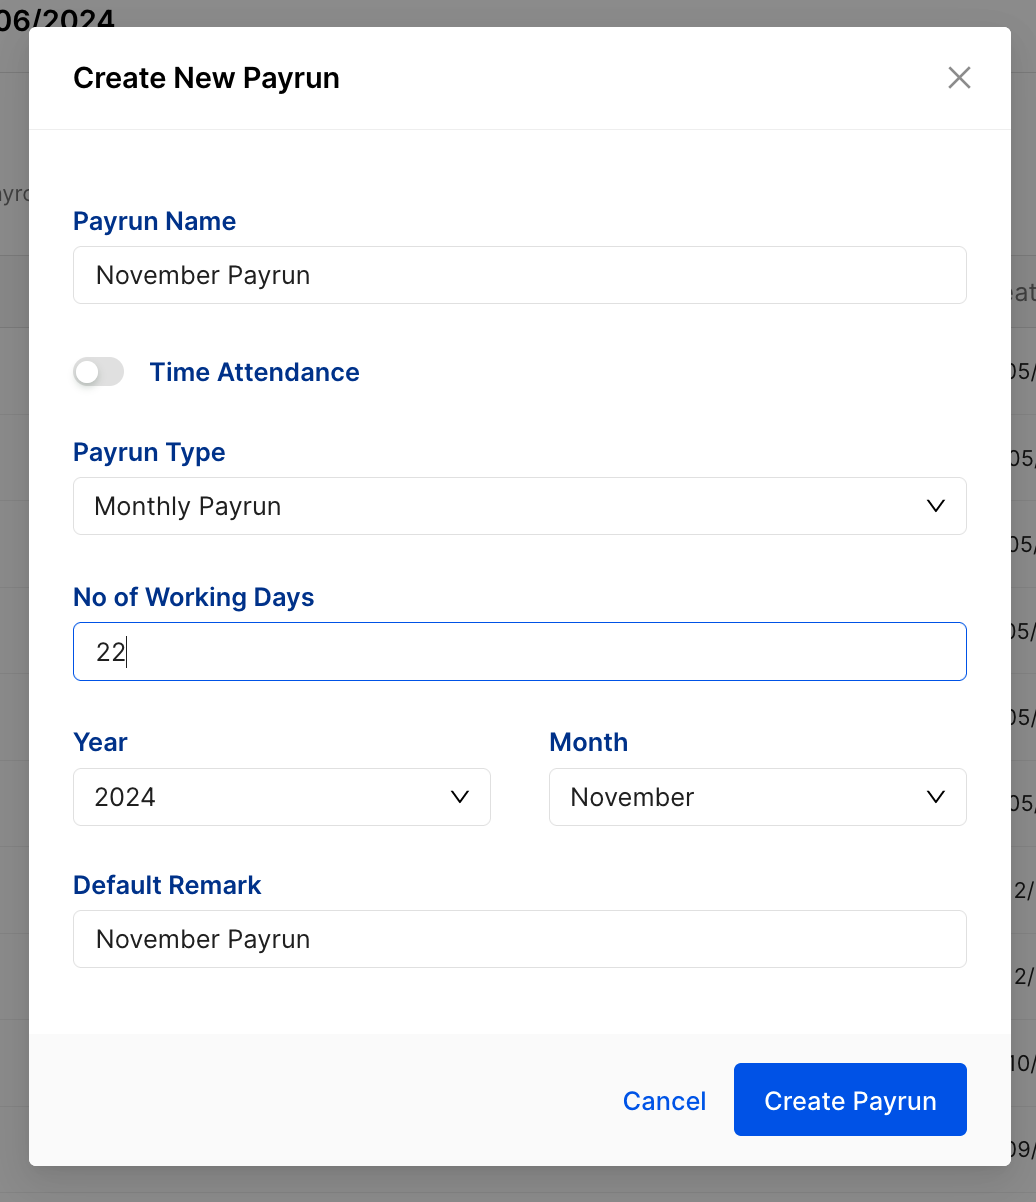
III. Variable – This is if you decide that you want a different count each month. If you choose this option add the number of days every time you create a payrun

Figure 3 – Working hours

c. Preferred input format

When uploading no pay or Overtime times for the month, you can choose between two input formats

I. Days and hours – If you select this option, your input will be in days and hours. So an input like 1.5 would mean I day 5 hours

II. Days and half days – if you select this option, your input will be in days and half days. So an input like 1.5 would mean one and a half days

III. Decimal inputs – if you select this option, your input will be considered as a decimal number. So, an input like 1.25 would mean one day and a quarter of a day

Figure 3 – Working hours

4. Input values with four decimal places

This is a practice of some accountancy professionals. If you switch this on toggle, you can input and do calculations on values with 4 decimal places. And have the final figures rounded off to 2 decimal places. This will ensure better accuracy.

Figure 3 – Working hours

Step 3 – Update your payroll policies

1. Hourly/day rates for calculations

This series of settings helps you cater to different nuances in calculating the hourly rate or day rate for your pay items. This is important in 3 different pay items which you can choose to use,

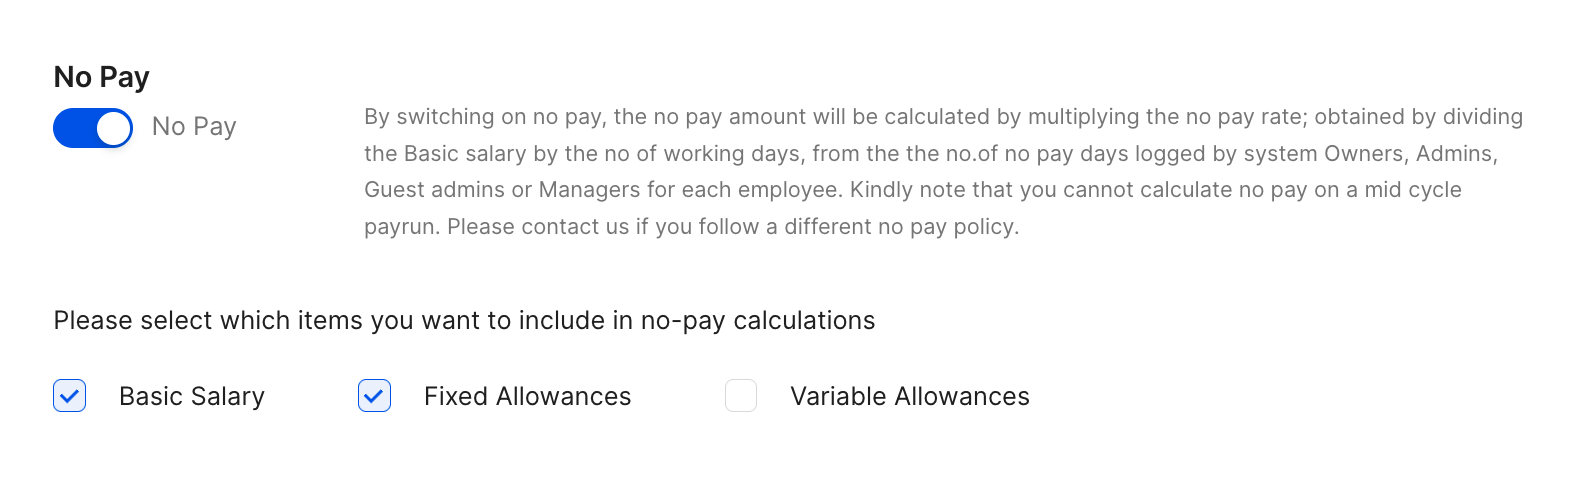
a. No pay

Here’s how your no pay rate gets calculated.

I. Switch on the toggle and select which pay items will be used to calculate the no pay rate.

II. This rate will be multiplied by your employee’s no pay time to get the no pay amount for the month

Figure 3 – Working hours

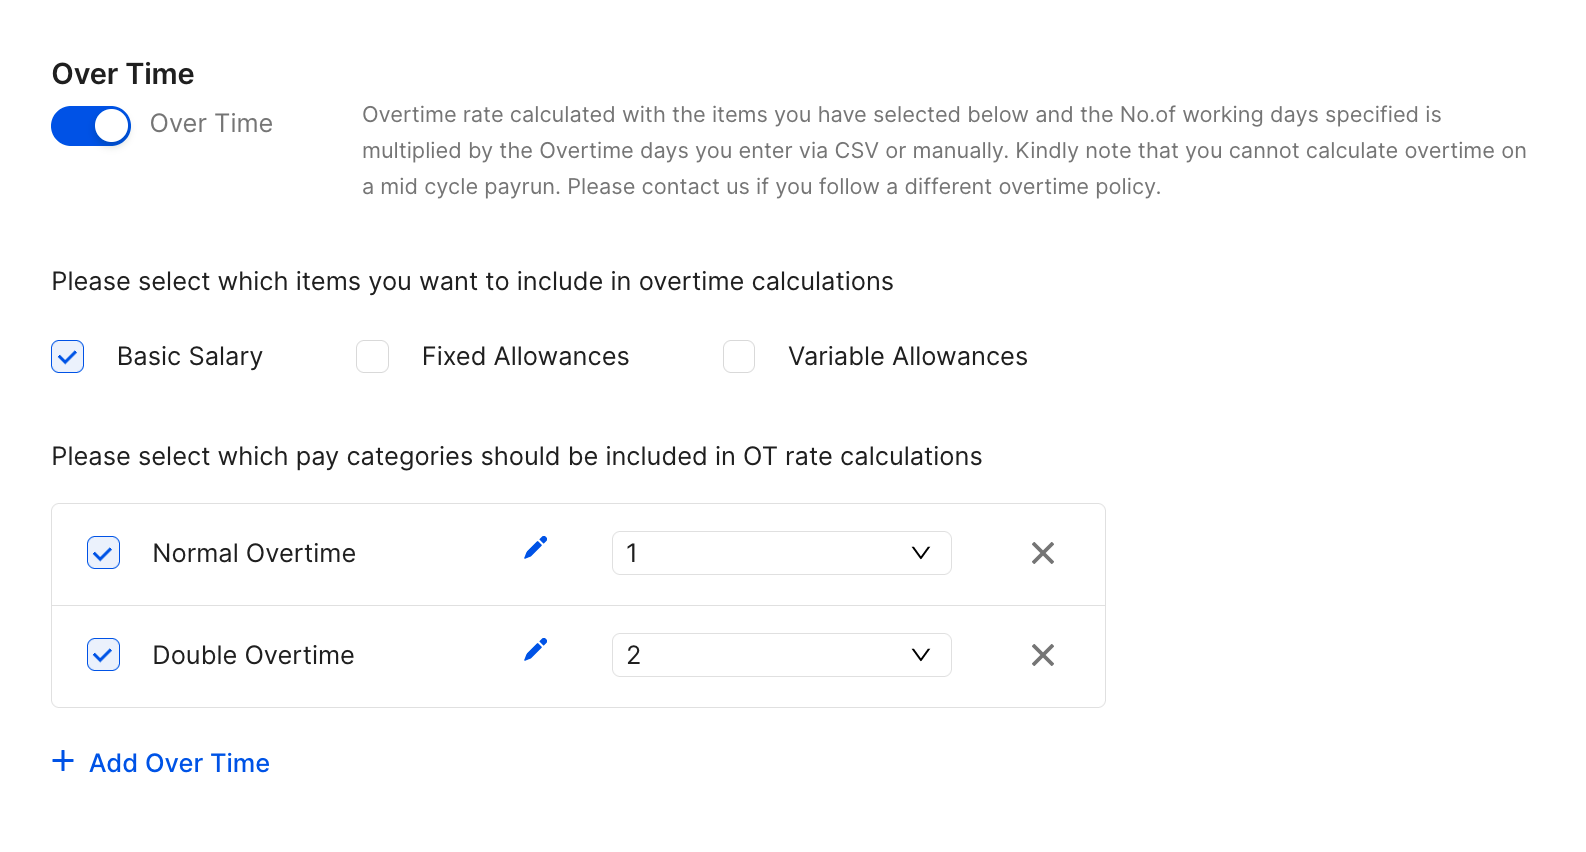
b. Over time

Here’s how your overtime rate gets calculated.

I. Switch on the toggle and select which pay items will be used to calculate the overtime rate.

II. Configure the overtime types and their rates that you want to use. If you want an overtime type called “Normal Overtime” and the hourly rate to be multiplied by only one, select the rate as one. If you want an overtime type called “Double overtime” and your hourly rate to be multiplied by 2, select the rate as two.

Figure 3 – Working hours

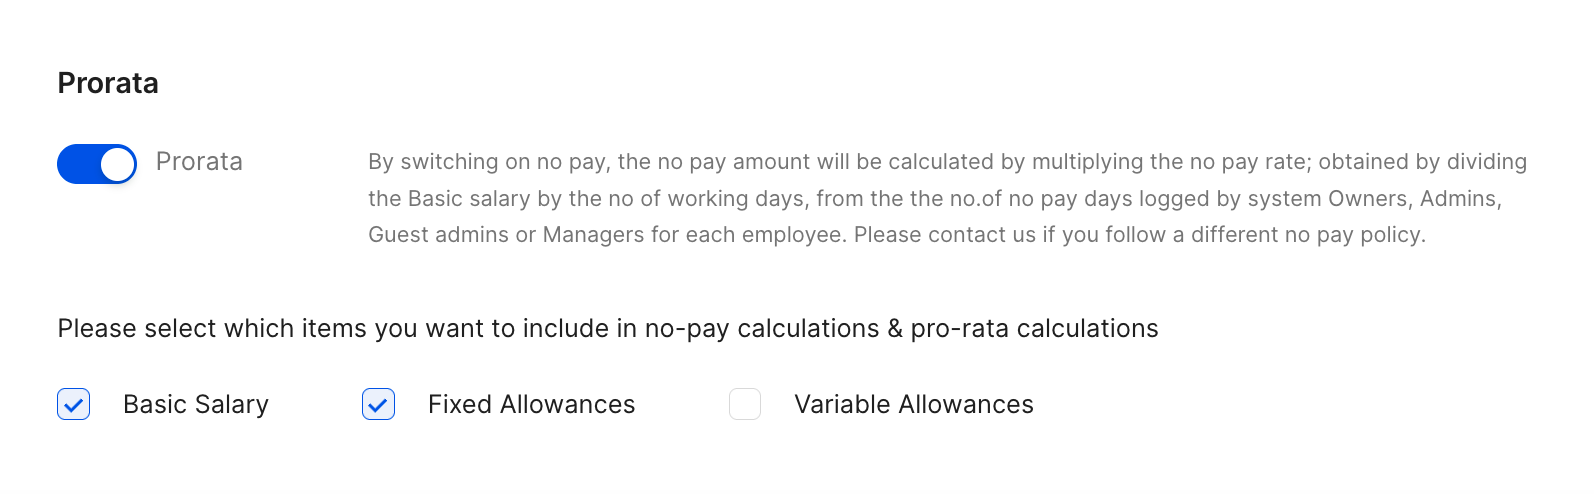
c. Pro-rated salaries

Here’s how your monthly salaries get prorated.

I. Switch on the toggle

II. Select which pay items will be used to calculate the daily rate for employees who joined or resigned in the middle of the pay cycle

Figure 3 – Working hours

2. Stamp duty

Switch this on to deduct stamp duty on net salaries above 25,000 LKR

3. Budgetary relief allowance

Switch on to apply budgetary relief allowance 1 and 2 when applicable to your payruns

4. Foreign currency pegged payrolls

This feature can be used to make up for the fluctuating value of the Sri Lankan rupee compared to a foreign currency associated with the generated income. you have the option of maintaining base salaries in LKR or a foreign currency of your choice. The variance will be added as an allowance to the payrun

5. Tax on tax

Switch this on if the employer bares the APIT liability onbehalf of the employee. 

Was this article helpful?

Your feedback helps us improve these guides.

Thanks for the feedback — glad it helped.

Still need a hand?

A real human on our team will look at your ticket and come back to you — typically within a few working hours.

Open a support ticket